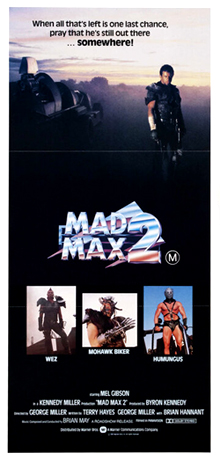
| V8 INTERCEPTOR #1 ORIGINAL
(HERO) CAR |
During late 1980, Mad Max 2
pre-production began to get underway and the original black Interceptor
from
the first film (VIN: JG66ND 43660 K, see
The Interceptor: Mad Max
for details),
was re-acquired by Kennedy
Miller
Productions for use in the sequel to be shot outside Broken Hill, NSW in
mid-1981. The vehicle was
to
have a more worn, tired and 'battle-scared' look with the following
modifications carried out: |
| |
| EXTERIOR MODIFICATIONS |
| |
|
|
|
| |
Arcadipane Concorde Nose |
|
|
| |
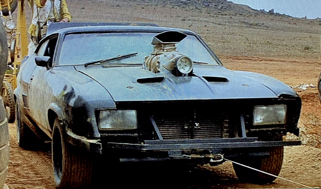
The Interceptor's iconic Arcadipane nose cone was retained but the lower air-dam section was
removed to give more ground clearance on outback roads often seen clogged
with debris. The
script
called for the entire
Concorde nose section to be smashed off during the opening chase
sequence
leaving a somewhat mangled front grille with
two, now misaligned headlights. |
|
| |
|
|
|
| |
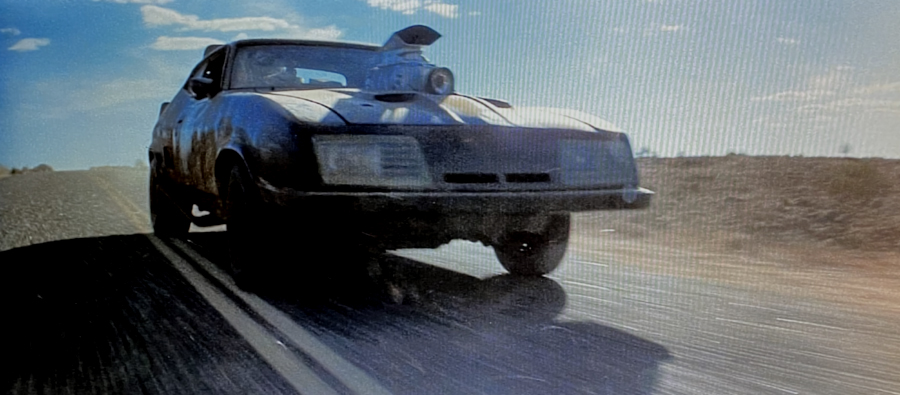
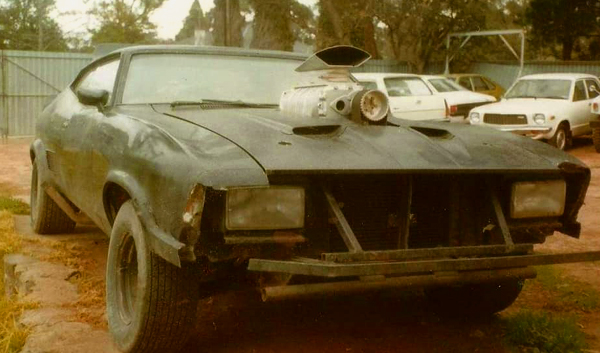
The Arcadipane Concorde nose only survived
the first few minutes of the movie being
smashed off during the opening
chase sequence. Seen here is the #2 stunt car which
has a duplicate Concorde nose fitted matching the #1 original car. |
|
| |
|
|
|
| |
Wheel Flares / Roof
Spoiler - All remain the same from the first film. |
|
| |
|
|
|
| |
Boot Spoiler |
|
|
| |
The back boot lid was removed for the
external fuel tanks (see section below), so only the
rear panel
mounted spoiler tips remain on the vehicle. |
|
| |
|
|
|
| |
The boot spoiler tips remained on the car
after the boot was removed for the external fuel tanks.
Note here the satin black pin-stripe that separated the
black-on-black paint of the original car. |
|
| |
|
|
|
| |
Paint |
|
|
| |
The gloss black finish remains the same
except the MFP badges are now gone and extensive
rust and dirt weathering has been added by the film's art department
over most parts of the
car. A small detail is the AM radio aerial on the upper left-side fender
tucked away in the
first movie but removed altogether in the second film leaving a hole.
This is evident in
the scene when the Feral Kid climbs over the passenger door to fetch his
musical toy. |
|
| |
|
|
|
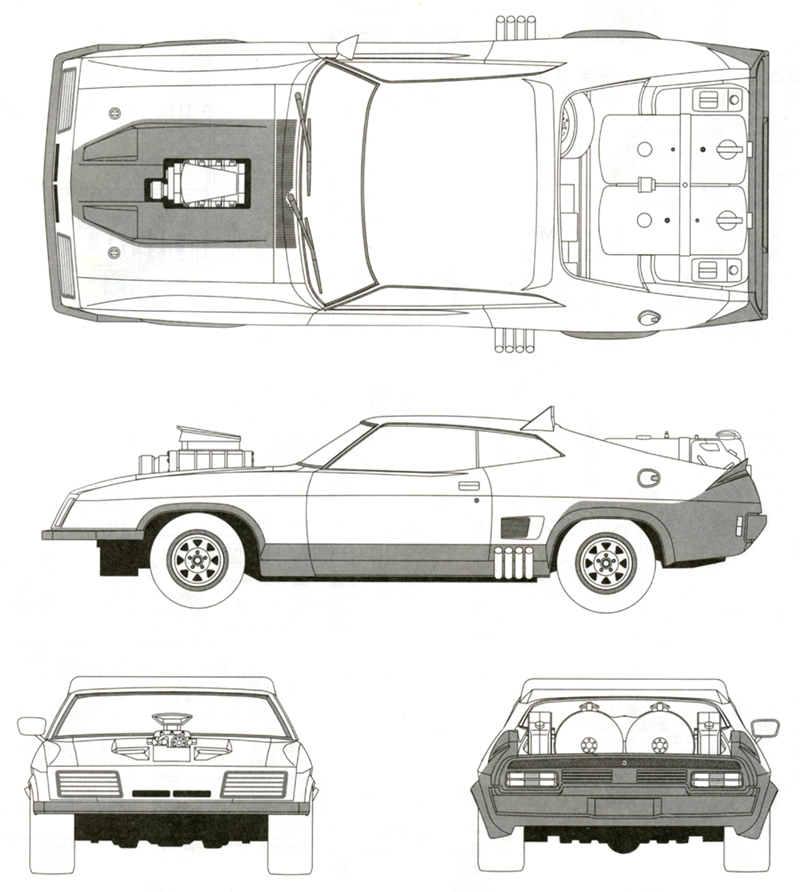
A four-view schematic of the V8
Interceptor as modified for the Wasteland
with the front air-dam removed
and exterior fuel tanks added.
Source: Aoshima 1:24 plastic
kitset. |
| |
|
|
|
| |
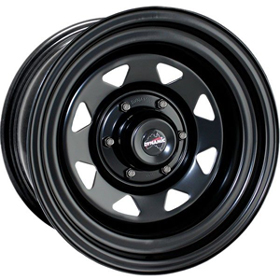
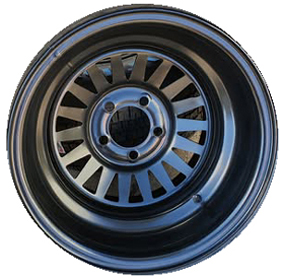
Wheels & Tyres |
|
|
| |
The two front wheels are the same
steel-centred, 8-spoke Sunraysia styled van wheels
painted satin black that were seen in the first film. The two rear
wheels however are now
steel-centred, 18-spoke Turbine styled mag wheels.
All tyres used
were the B.F. Goodrich T/A Radial type and like the
wheels were heavily
weathered and 'rusty' looking to suit the outback living conditions seen
in the movie. |
|
| |
Front Wheel Size: 14" x 8"
Front Tyre Size: P245/50R14 |
Rear Wheel Size: 15" x 10"
Rear Tyre Size: P265/50R15 |
|
| |
 |
 |
|
| |
|
|
|
| |
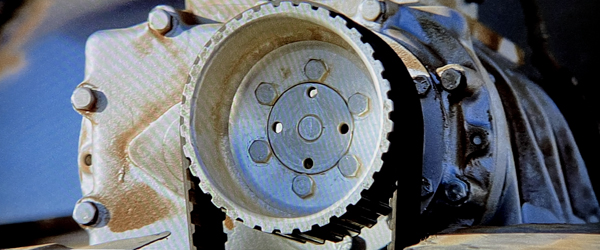
Detroit Diesel 6-71 Supercharger
(non-functional) |
|
| |
The original Weiand Supercharger was
removed after the first film production wrapped
in early 1978 and so a new one had to be acquired. The base compressor
unit is now a
Detroit Diesel 6-71 casing and front plate. A
Cragar backing plate was used, a logo of
which can be seen in the film and mislead the untrained eye as to it
being a Cragar blower.
The prominently seen drive-pulley was attached to the casing by adapting
a water pump
component. Like the first film, the
blower was
made from real components but was totally
non-functional. It
was also made to
look
weathered and worn by the film's art department
to match the rest of the
car.
The air scoop is now a fabricated part by the film's vehicle builders
based on the original
Scott Engineering injector hat. Being scratch-built, the dimensions are
not perfect and
so it looks slightly larger and sits slightly higher then the original
Scott parts.
The drive
pulley wheel was spun in the first film off the air conditioning
compressor but
for the new
movie it was re-configured as a simple, under-bonnet v-belt setup coming
off
the engine
crankshaft. A tensioner pulley was used to install and remove the
smaller
under-bonnet belt
when required. |
|
| |
|
|
|
| |
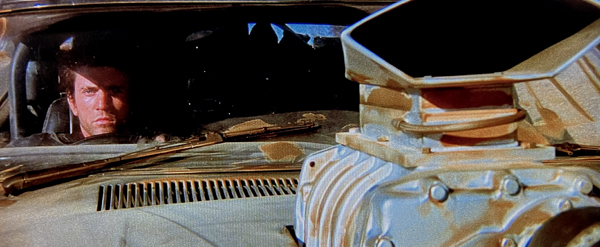
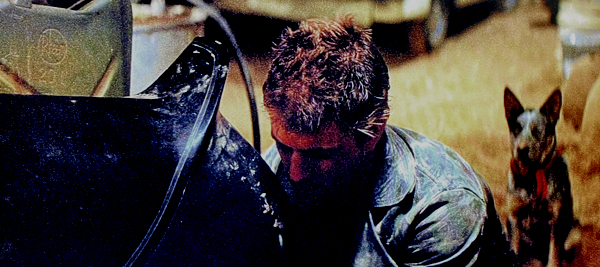
A good view of the Supercharger
that, like the rest of the vehicle, was weathered with a
mixture of diesel fuel and dirt. Due to being a fabricated unit, the air-scoop is slightly
larger and
mounted slightly higher than the components used in the first film. |
|
| |
|
|
| |
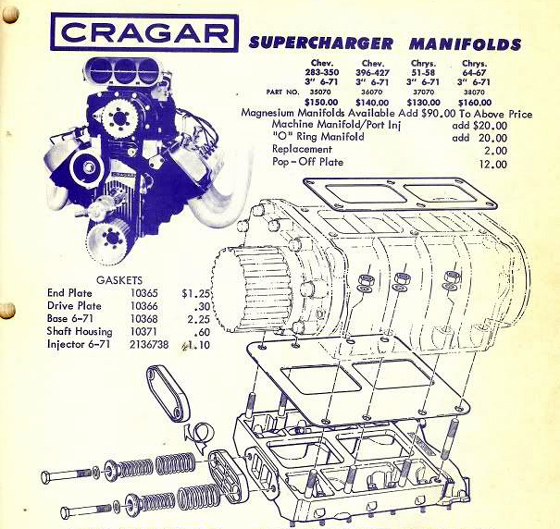
Only a Cragar backing plate was used in
the film but this 1960s advertisement schematic of
a Cragar compressor unit shows to good effect how it bolts onto the
engine intake manifold. |
|
| |
|
|
| |
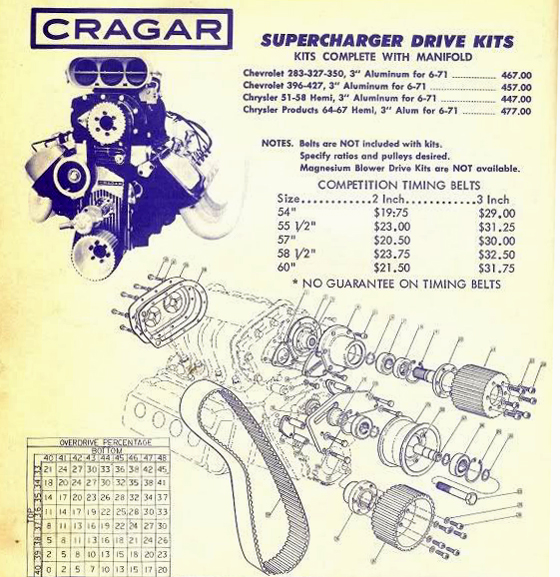
Parts list schematic for a Cragar
Supercharger rotor casing gearbox and pulley
assembly from a 1960s advertisement. |
|
| |
|
|
| |
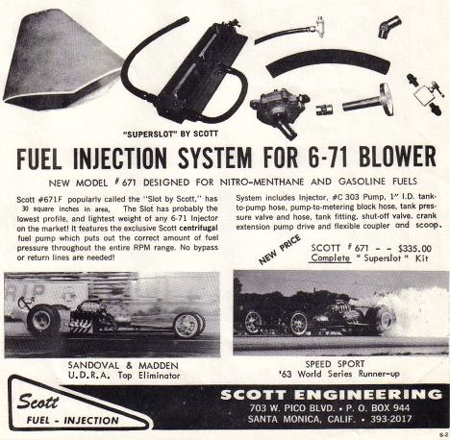
The 'injector hat' system used in
Mad Max 2 was a fabricated one based on
the Scott air-intake design used in the first film. This 1960s advert
shows
to good effect the general shape of the air scoop. |
|
| |
|
|
| |
The supercharger base unit was
mounted higher on the engine in Mad Max 2 with the
prominent drive pulley wheel sitting fully above the bonnet cut-out lip. |
|
| |
|
|
| |
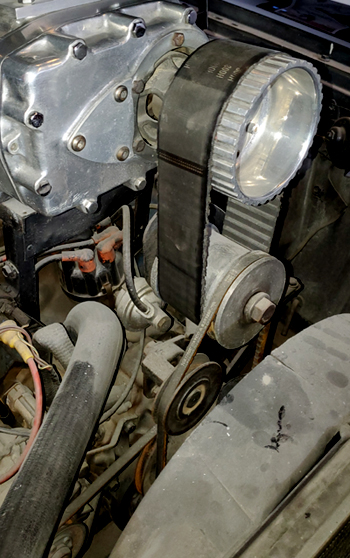
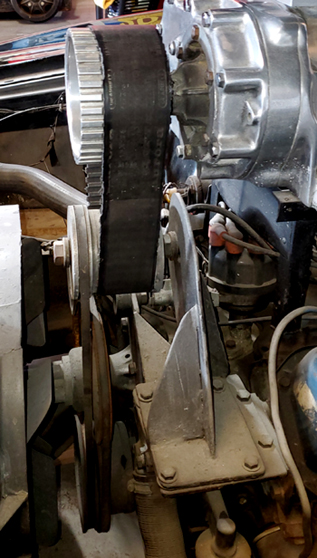
Two views of the #1 original Interceptor
belt and pulley system set up to spin the fake supercharger drive
pulley wheel. It was driven off the
engine crankshaft via a tensioned v-belt that could
easily be removed or
installed depending on what was required for
filming. The supercharger
starting up was simply done by
starting the car's engine or turning it off to
show it stopping.
Photos: Robert Sandler. |
|
| |
|
|
| |

The Detroit Diesel base unit was mounted on top of
the original 4V carburettor by a welded
steel
frame as seen here in this detailed image of the preserved #1 original
car. The original
GT
4V carburettor
was run without the use of an air-filter.
Photo: Robert Sandler. |
|
| |
|
|
|
| |
Zoomie Exhaust Pipes |
|
|
| |
The 8-pipe upturned zoomie exhausts have been modified for
a much more finished look. They
are
now longer, meaner looking straight pipes without the chrome cuff extensions. |
|
| |
|
|
|
| |
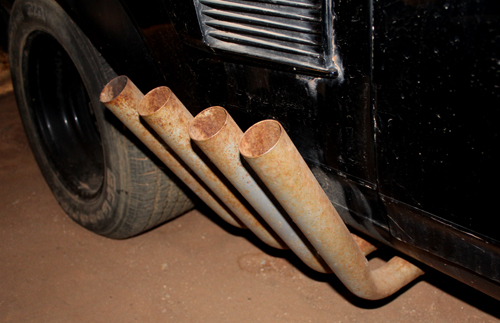
The new side pipe design was a big
improvement over the ones in the first film.
(NOTE: Image used is of Adrian Bennett's V8 Interceptor
replica).
Photo: Simon Beck. |
|
| |
|
|
|
| |
External Fuel Tanks
(non-functional) |
|
|
| |
The large, custom built fuel tanks were
fashioned for the film car to reflect the dire fuel shortage
depicted in the story. The tanks themselves are completely 'made for the movie' and
not based
on any pre-existing manufactured tanks for industrial use. They are not hot water
cylinders and
have no
ability to retain fluids under pressure. There are two small gauges on
the top of each
tank at
the back end and the fuel caps are from British Leyland double-decker buses. The
tanks
are each 900mm long
and
450mm wide which have the following capacities: |
|
| |
|
|
|
| |
Interceptor Long Range Fuel Tank: |
27.50 Imp. Gal (125.00L) |
|
| |
External Tank No. 1: |
31.49 Imp. Gal (143.16L) |
|
| |
External Tank No. 2: |
31.49 Imp. Gal (143.16L) |
|
| |
Total: |
90.48 Imp. Gal (411.33L) |
|
| |
|
|
|
| |
Interceptor Mileage (average): |
14.50 m/p/g |
|
| |
|
19.48L / 100km |
|
| |
|
|
|
| |
Going on the assumption that being a
police car, the V8 Interceptor has a long range fuel tank
installed which gives the modified car a total capacity rounded of 90.5
Imp. Gallons (411 litres).
Based on the average mileage of an XB Falcon GT coupe that would give
the Interceptor a range
of 1,311.96 miles (2,111.39 km). This
would be more or less Sydney to Alice Springs in Australian
terms or Invercargill to Auckland then almost back to Wellington for New
Zealanders. This is all
with the fictional supercharger off, which if it was real and running, would greatly reduce range.
In short, it can basically be argued the
V8 Interceptor will go 1,300 miles
on full tanks of
90 imperial gallons or
metrically 2,100km with full tanks of 410 litres. |
|
| |
|
|
|
| |
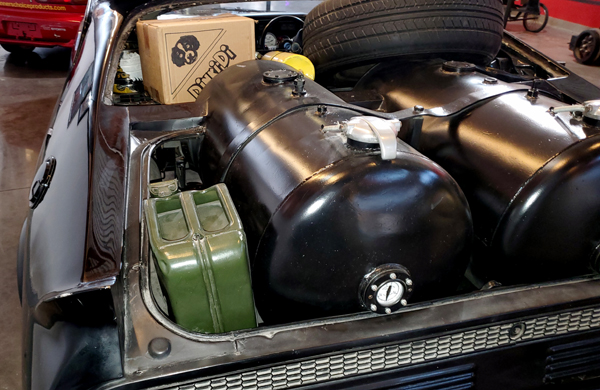
The two external fuel tanks on the #1
original car as they look today. The jerry cans are WW2-era
British type W1D fuel containers. Other
survival gear adorned the back of the vehicle to create
a 'mobile
home' outback survival look.
Photo: Robert Sandler. |
|
| |
|
|
|
|
Detonator Box Prop (non-functional) |
|
|
| |
A non-functional film prop built by the
art department and mounted under the car next to the
left rear leaf-spring. It's story purpose is to spark fuse wire leading
into the external fuel tanks
in the event the
fuel caps
are tampered with. |
|
| |
|
|
|
| INTERIOR MODIFICATIONS |
| |
|
|
| |
The following items were deleted /
removed:
- Front & rear passenger seats.
- Carpets, door trims & roof linings.
- Centre sports console.
- Dashboard police light.
- Dashboard police light mounting plate (sometimes missing,
in other shots not?).
- Roof mounted police radio.
- Rear window glass, metal cross beam and back boot lid. |
|
| |
|
|
|
| |
The following items were added / modified:
- Roll cage consisting of both 1.5 inch and 1.25 inch welded
tubular steel.
- Metal passenger-side, door mounted dog seat.
- Fuel gauge with red warning light.
- Modified gear stick with repositioned blower switch.
- Rear parcel tray with spare wheel, auto parts, jerry cans and survival
gear. |
|
| |
|
|
|
|
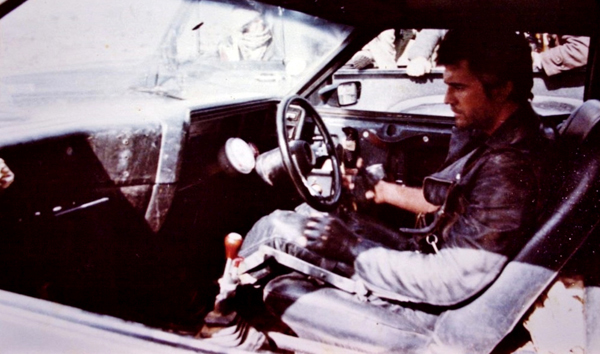
Actor Mel Gibson getting ready for a scene
in the #1 car during filming in mid-1981. Of note is the
absence
of the
dashboard police light mounting plate seen in some shots but missing in
others.
Also of note is the laminated tinted-band windscreen, one of the RPOs
found on the original car. |
|
| |
|
|
| |
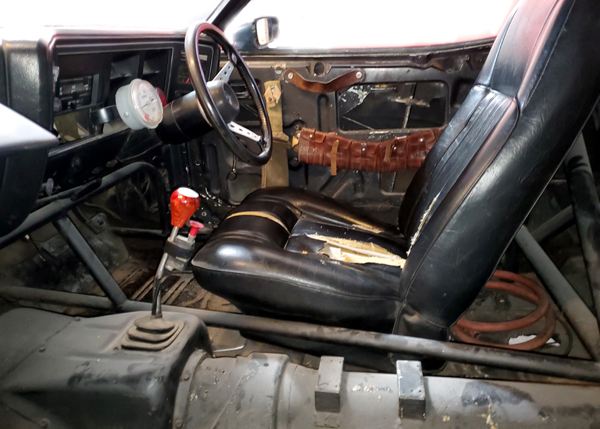
The interior of the #1 Interceptor as it
looks today. The welded tubular steel roll cage does not run
up
the A-pillars and across the top of the windscreen like most designs but
instead runs along the
bottom of the dashboard. Being a film production this was done to simply
save the time and
expense on what would otherwise have been a more complicated fitting.
Photo: Robert Sandler. |
|
| |
|
|
| |
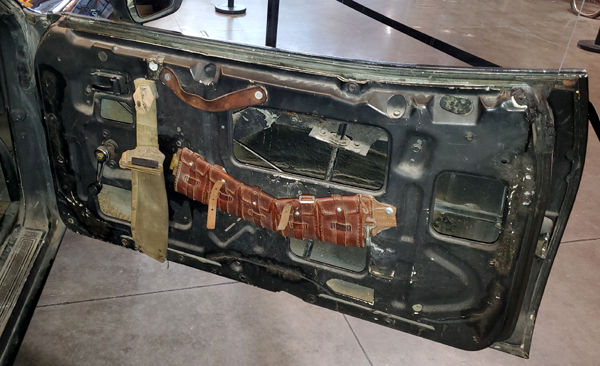
The driver's side door still has the
remains of the film production props - what looks to be
a machete sheath, a WWI ammunition belt and an improvised leather door
handle.
Photo: Robert Sandler. |
|
| |
|
|
| |
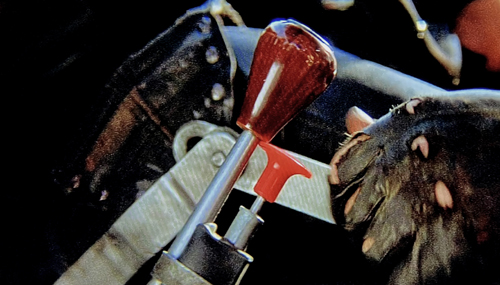
The repositioned supercharger switch and
non-standard Falcon gear-stick knob. |
|
| |
|
|
| |
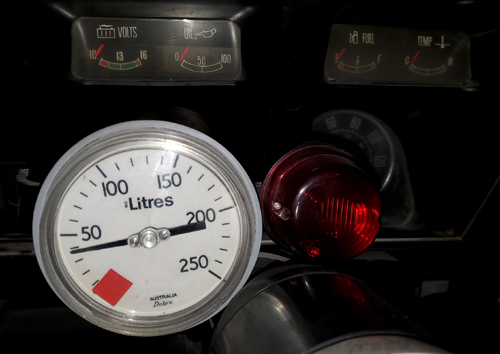
A fuel gauge and warning lamp was
installed but at the expense being able to see
the
engine tachometer. Note the top row GT gauge needles are positioned
/ / / /
and it has the standard GT 140mph speedometer with 7k tachometer.
Photo: Robert Sandler. |
|
| |
|
|
| |
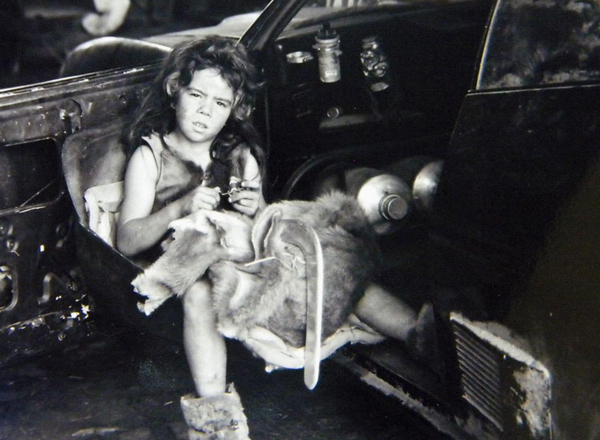
Eight year old actor Emil Minty (The Feral
Kid) found the dog seat to be the perfect getaway
spot both on and off screen with Emil often seen taking refuge there between
scenes. |
|
| |
|
|
| |

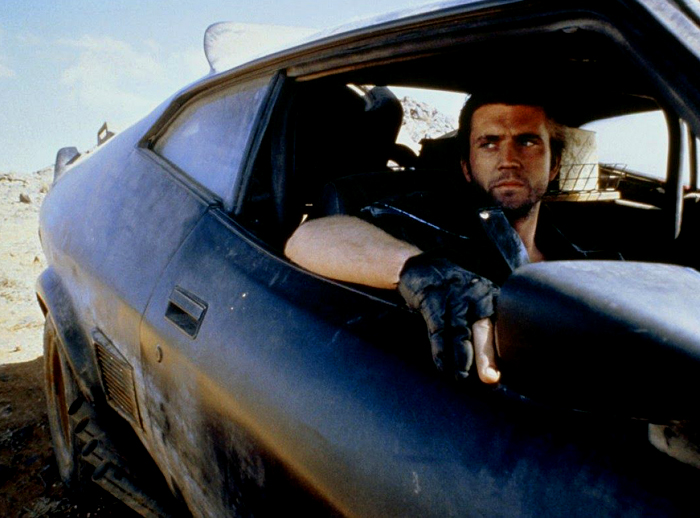
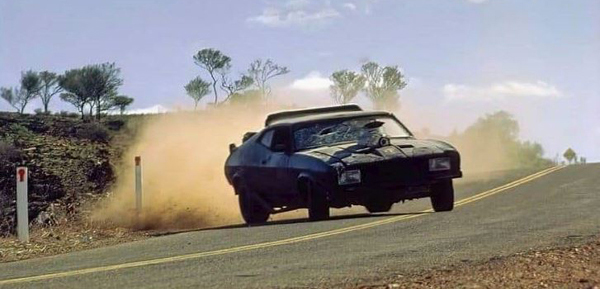
The #1 original car was used for interior
close ups and detail shots. It was however seen in one
driving shot (pictured above), during the opening chase where Max looks at his side
mirror - the
camera then
pans left to reveal marauders appearing on the road behind him.
When Bob Fursenko later acquired the car he discovered the camera
platform mounting
brackets from this shot still attached along the underside. |
|
| aaaaaaaaaa |
|
|
aaaaaaaaaa |
| V8
INTERCEPTOR #1 OWNERSHIP HISTORY |
| |
|
|
| 1973 |
Rural Motors, Orange, New South Wales. |
Ford dealership. |
| 1974 - 1977 |
Owner(s) unknown |
Registered IFE509. |
| 1977 - 1978 |
Kennedy Miller Pty. Ltd. |
Mad Max production. |
| 1978 - 1981 |
Murray Smith, Melbourne,
Victoria. |
Gifted in lieu of film production wages. |
| 1981 |
Kennedy Miller Pty. Ltd. |
Mad Max 2 production. |
| 1981 - 1982 |
Broken Hill autowrecker? |
Transferred to Ray Evans? |
| 1982 - 1983 |
Ray Evans, Upper Sturt
Wreckers, Adelaide, S. Australia. |
Displayed derelict outside the business. |
| 1983 - 1993 |
Bob Fursenko, Adelaide, S. Australia. |
Restored to roadworthy condition and repainted. |
| (1990 - 1993) |
National Motor Museum,
Birdwood, S. Australia. |
On loan from Bob Fursenko. |
| 1993 - 2011 |
Cars of the Stars Motor Museum,
Keswick, UK |
Sold by Bob Fursenko. |
| 2011 - Present |
Miami Auto Museum, Florida, USA |
Relocated now named as the Orlando Auto Museum. |
| |
|
|
The weary and worn V8 Interceptor #1
soon after filming finished at Broken Hill and about the
time it was taken to Upper Sturt Wreckers in Adelaide. Although not seen
here, the passenger's
side windscreen wiper went missing during filming and the
supercharger air scoop hat
was later damaged while it was on display outside the wreckers yard.
Photo Source: Facebook - Mad Max Garage Inc. |
| |
|
|
| V8 INTERCEPTOR #2 STUNT CAR |
A second Ford Falcon was cast for the
film which would be used for the high-risk stunt driving and chase
scenes. It was a yellow coloured 1974 Ford XB Fairmont Hardtop that had
a 302ci V8 and interestingly, a
T-bar automatic floor shift transmission - this is presumably for stunt
driving reasons with many vehicles
operating in close proximity at speed. It was upgraded with all the same
fittings as found on the #1 original
car
such as the Concorde nose, supercharger, 8-pipe zoomies and external fuel
tanks but for some reason was
only given an overall stain black paint finish? Being a Fairmont, several
stock items had to be fitted as well:
an XB
GT bonnet (with locking pins), an XB GT fuel cap and the distinctive XB GT coupe side flutes behind
the side doors. The interior dashboard
and steering wheel remained standard Fairmont and much of the
interior
remained undecorated with the extra
set pieces found in the #1 car. A black GT styled driver's
seat
however was installed to match the first car. |
| |
|
|
|
|
|
|
JG67PL 57112 K |
|
| |
Type: |
1974 Ford XB Fairmont Hardtop |
|
| |
Model: |
18317 |
|
| |
Body Type: |
65D |
|
| |
VIN Number: |
JG67PL 57112 K |
|
| |
Country Built: |
J |
Australia |
|
| |
Plant: |
G |
Broadmeadows, Melbourne |
|
| |
Model Code: |
67 |
Fairmont Hardtop |
|
| |
Year Built: |
P |
1974 |
|
| |
Month Built: |
L |
January |
|
| |
Engine: |
Y |
240hp 302ci (4.9L) V8 / 2V carb / HC |
|
| |
Transmission: |
B |
Automatic 3-spd T-Bar Floor Shift |
|
| |
Trim: |
- |
Unknown but most likely (B) Black Vinyl. |
|
| |
Paint: |
- |
Known to be a 'yellow.' Either (A)
Yellow Sand or (M) Yellow Blaze. |
|
| |
Optioned RPOs: |
- |
Unknown at this time. |
|
| |
SIDO No.: |
- |
Unknown at this time. |
|
| |
|
|
|
|
| INTERCEPTOR #2 STUNT CAR
DIFFERENCES |
| |
|
|
|
The two
V8 Interceptors used for the movie were virtually identical, however the
#2 stunt
car
has a few
notable major component and minor cosmetic differences as listed below: |
|
| |
- The engine was a 302ci V8 not
a GT configured 351ci V8.
- It has an automatic T-bar transmission.
- The front / back suspension is 'jacked up' with the wheel arches
clearing the tyre radius.
- It has a noticeably overall satin black paint finish creating a
more worn, faded look.
- The supercharger unit looks clean and new whereas the #1 car unit was
weathered.
- There was slightly more weathering applied to the rear fuel tanks.
- There are no windscreen wipers.
- The right GT bonnet locking pin is missing with the right-side bonnet slightly buckled.
- It retains the original 2-spoke Fairmont steering wheel and dashboard.
- There is no dog seat and only minimum interior decoration with survival
gear.
- Sometimes the vehicle has an interior windscreen-mounted rear view mirror
fitted. |
|
| |
|
|
|
|

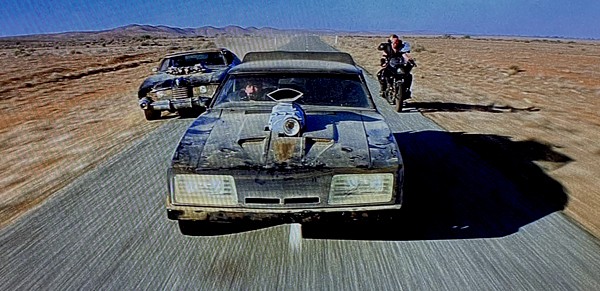
The #2 stunt car
(left) compared to the #1 original car
(right). Both were virtually identical to the eye except for
a few minor differences such as the overall satin black paint and
missing windscreen wipers on the #2 car.
Note also the slightly buckled right-side bonnet (left)
as compared to the original car on the right. |
|
|
| |
Stuntman Max Aspin performing the
(heart-braking for Ford fans!) V8
Interceptor roll
scene
that
would
crumple up the #2 stunt car so it could then be used for...
Photo: via David Larter. |
|
| |
|
|
| |
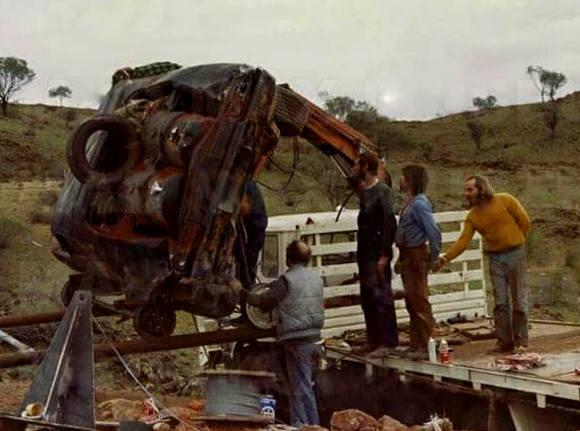
...the steep ravine crash scene which was
filmed at Red Hill 15km South of Broken Hill
by
rolling the Fairmont wreck off a parked truck via a steel cable
release.
Photo: via David Larter. |
|
| |
|
|
| |
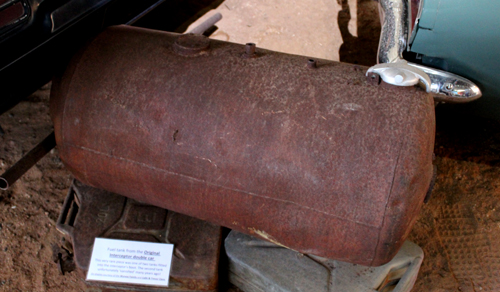
The only surviving external fuel
tank from the #2 stunt car. It measures 900mm
long by 450mm in diameter for a capacity of
143 litres. It is now on display at
Adrian Bennett's Mad Max 2 Museum at Silverton, NSW.
Photo: Simon Beck. |
|
| |
|
|
| |
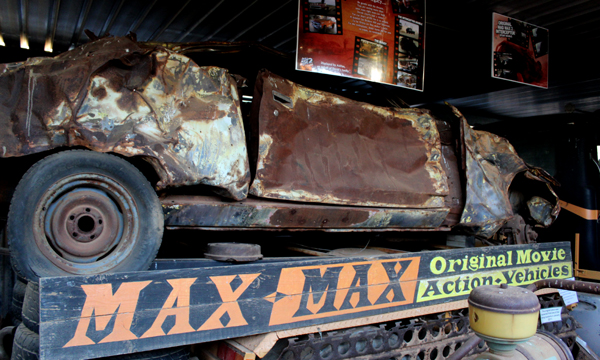
The somewhat rusted remains of the #2
stunt car as it is preserved today by Adrian Bennett
at the Mad Max 2 Museum located at Silverton 20km from Broken Hill,
NSW.
Photo: Simon Beck. |
|
| |
|
|
| |

The moment in Mad Max 2 when the
#2 stunt car smashes it's Concorde nose off by ramming
a Ford Landau. This chase was filmed along Wilangee Road outside Silverton
in May, 1981. |
|
| |
|
|
| |
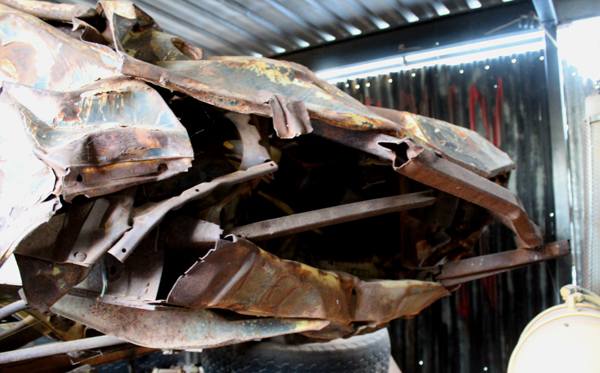
The #2 stunt car front grille as it looks
today. Only steel frame sections of the customised
Concorde
nose survived the movie rear-end smash
(movie image above), and later crash and roll stunt.
Photo: Simon Beck. |
|
| aaaaaaaaaa |
aaaaaaaaaaaaaaaa |
aaaaaaaaaaaaaa |
aaaaaaaaaaaaaaaaaaaaaaaaaaaaaaaaaaaaaaaaaaaaaaaaaaaaaaa |
aaaaaaaaaa |